In this tutorial I am going to cover Schema creation in Oracle XE database which is required as a starting step before installing the SOA Suite 11g.
Here in this tutorial we are going to Run Repository Creation Utility provided by Oracle for SOA Suite 11g ( Version 11.1..1.3 ).
Go to the folder where you have downloaded the Repository Creation Utility version 11.1.1.3 ( c:\SOAInstallables as per tutorial I)
Double click the rcu.bat in folder structure similar to ofm_rcu_win_11.1.1.3.0_disk1_1of1\rcuHome\BIN\ and you should see below screen sequence.
1. Welcome Screen
2. As we want to create requred schema for installation select create.
3. Provide the required details
Note : username used here is SYS, this should be the user with SYSDBA role
4. Select the Components for which you want to generated schema tables.
5. Here you can choose to provide single username / password for all schema component or also you do have flexibility to provide username/password for individual components. For development environment use single username/password for all components.
6. This screen will allow you to choose different tables spaces for the components. kept it defult and press next.
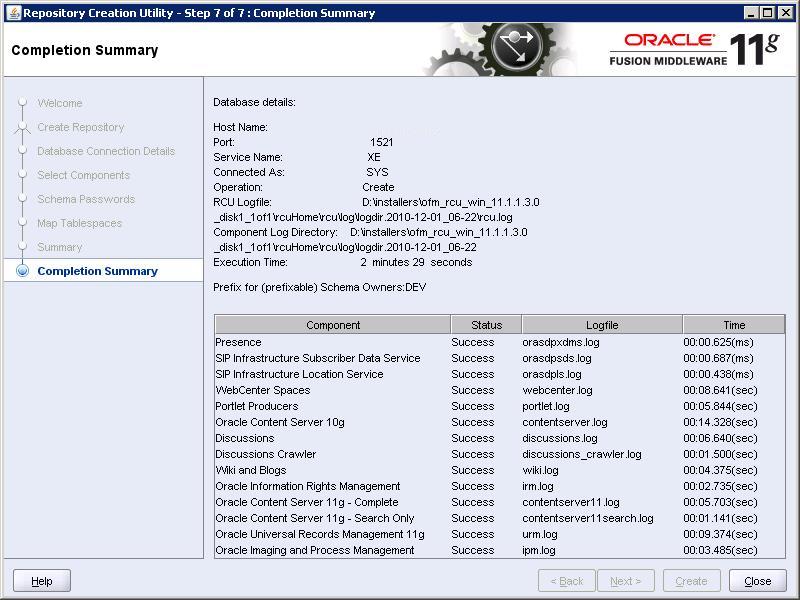
7. Summary of all installation is generated at the last. Click close the finish the process.
Friday, December 31, 2010
Wednesday, December 1, 2010
Upgrade Weblogic Server 10.3.2.0 to Weblogic Server 11g (10.3.3.0)
Here in this tutorial we are going to upgrade Oracle Weblogic Server 10.3.2.0 to Weblogic Server 11g i.e. 10.3.3 Version. This is very simple are pretty straight forward process.
If you are upgrading SOA Suite 11g 11.1.1.2 to SOA Suite 11.1.1.3 they you may required this to upgrade you Weblogic Server 10.3.2.0.
Go to the Program Files and Weblogic Installation and select Smart Update.
This is gona ask you for username and password for Oracle Support as shown in below screen shot. Provide the required information and login,
Now you should able to see Smart Update Wizard Screen as shown below, go to the Maintanance Packs and select Update.
As shown in below screen select release 10.3.2.0 and in right you should be able to see Weblogic Platform (10.3.3.0) in Upgrade options. Click OK
This will start Oracle Installer for Weblogic server 10.3.3.0 as shown in below screen. Click Next
Uncheck if you dont want to receive any update from oracle
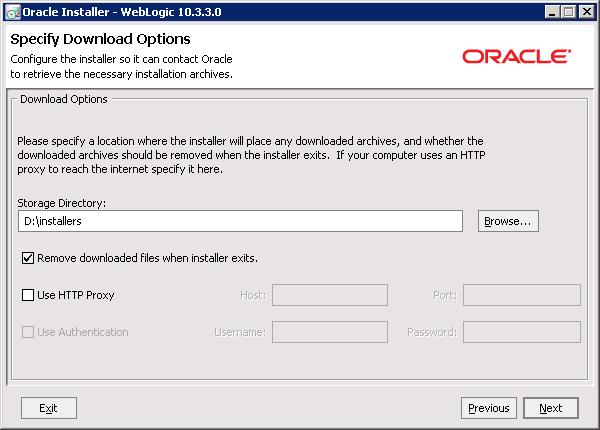
Select the location where you want to download the installation files.
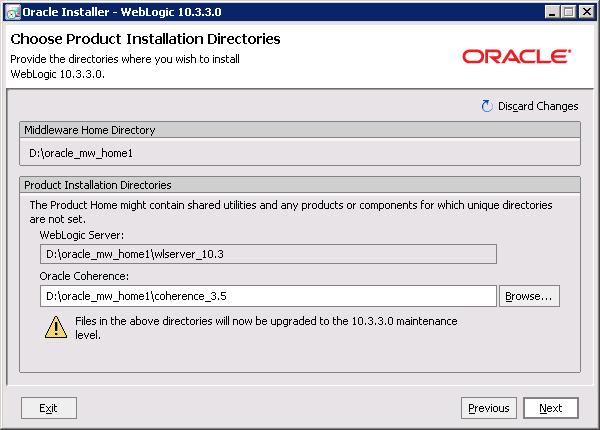
Here in below screen you need to specify in which directories you want to install the upgrade. Click Next to start installation process
After successful installation/upgrade you should be able to see below screen.
That's it. you done with the upgrade.
If you are upgrading SOA Suite 11g 11.1.1.2 to SOA Suite 11.1.1.3 they you may required this to upgrade you Weblogic Server 10.3.2.0.
Go to the Program Files and Weblogic Installation and select Smart Update.
This is gona ask you for username and password for Oracle Support as shown in below screen shot. Provide the required information and login,
Now you should able to see Smart Update Wizard Screen as shown below, go to the Maintanance Packs and select Update.
As shown in below screen select release 10.3.2.0 and in right you should be able to see Weblogic Platform (10.3.3.0) in Upgrade options. Click OK
This will start Oracle Installer for Weblogic server 10.3.3.0 as shown in below screen. Click Next
Uncheck if you dont want to receive any update from oracle
Select the location where you want to download the installation files.
Here in below screen you need to specify in which directories you want to install the upgrade. Click Next to start installation process
After successful installation/upgrade you should be able to see below screen.
That's it. you done with the upgrade.
Labels:
11g,
Installation,
SOA Suite,
Tutorial,
Weblogic
Subscribe to:
Posts (Atom)